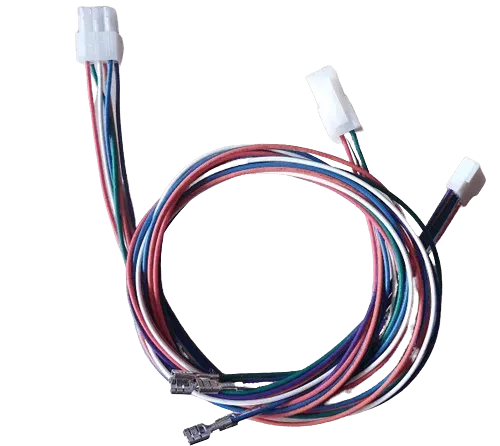
ArPiCade - Raspberry Pi JAMMA Adapter - 4 Player

Product information "ArPiCade - Raspberry Pi JAMMA Adapter - 4 Player"
ArPiCade 3 and 4 Player JAMMA Adapter for Raspberry Pi
The ArPiCade 3 and 4 Player JAMMA Adapter is designed for dedicated JAMMA arcade cabinets that require support for three or four players. It allows multiplayer arcade games to run from a Raspberry Pi using original cabinet wiring and controls.
This system is compatible with classic CGA tube monitor cabinets and can also be used with LCD or flat-panel displays when a tube monitor is unavailable or impractical to repair.
Overview and Setup
The ArPiCade 3 and 4 Player adapter connects directly to the JAMMA wiring harness and draws power from the cabinet’s switcher. No external power supplies are required.
Built on an open platform, ArPiCade allows customization of menus, display resolutions, and system behavior, making it well suited for multiplayer cabinets and custom arcade builds.
Key Features
- No cabinet modification required (optional harnesses available)
- Supports standard JAMMA or 6-button JAMMA configurations via DIP switches
- RGBS video output for arcade monitors or VGA for higher-resolution displays
- Amplified mono or line-level stereo audio output
Controls and Harnesses
Players 1 and 2 connect through the JAMMA harness and support up to two or three buttons by default. For additional buttons or players:
- 6-pin harness: Adds buttons 4, 5, and 6 for Player 1 and Player 2
- 9-pin harness: Adds Player 3 and Player 4 controls (Konami images may require two harnesses)
Some cabinets may require drilling new control panel holes if additional buttons are not already present. Pre-made plug-and-play harnesses are available in our store.
System Requirements
- Raspberry Pi 3B or 3B+ (supported images)
- ArPiCade 3 and 4 Player JAMMA Adapter
- JAMMA-compliant arcade cabinet
Raspberry Pi Model 3B Is Available Here (Stock Is Limited)
The ArPiCade 3 and 4 Player JAMMA Adapter is commonly paired with a Raspberry Pi 3B. You can purchase the Raspberry Pi Model 3B directly from HighScoreSaves while inventory is available.
Important Notes
- Provided images support Raspberry Pi 3B and 3B+ only
- Raspberry Pi is not included and must be supplied separately
- Caution: When installing the 4-Player adapter PCB, ensure pins are properly aligned before powering on. Incorrect alignment may damage the Raspberry Pi.
Game List Downloads
- 17 Konami Multiplayer Games
- 80 Three and Four Player Games
- 80 Multiplayer Games plus 5000+ Arcade Titles
Support and Community
ArPiCade 3 and 4 Player FAQ
Which Raspberry Pi models are supported?
Provided images support Raspberry Pi 3B and 3B+. Other models require separate images.Is a Raspberry Pi included?
No. The Raspberry Pi must be provided separately.How are Player 3 and Player 4 connected?
Using optional 9-pin harnesses. Some images require two harnesses.How do I enable extra buttons?
Use the optional 6-pin harness to add buttons 4–6 for Player 1 and Player 2.Do I need to modify my cabinet?
No modifications are required unless additional buttons must be physically added.What installation precautions should I take?
Ensure all pins are aligned correctly before powering on to avoid hardware damage.Are ArPiCade images returnable?
No. Images are not returnable, but exchanges are available if issues occur.Where can I get support?
Community and technical support is available on the ArPiCade forums.Login
1 review
October 17, 2025 6:12 PM
Perfect to customize my game
Love the forums that you can ask questions about customizing my Simpsons arcade game. Great and easy solution for a Pi


